Excel Workbook
Creating New Workbook - Visual Studio 2008
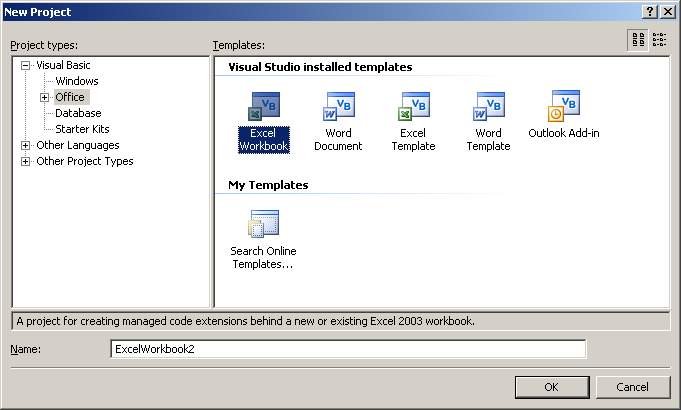
(File > New Project). Select Visual Basic Projects. Select Office
Select Excel Workbook and provide a name for this project. The name defaults to ExcelWorkbook. Press OK
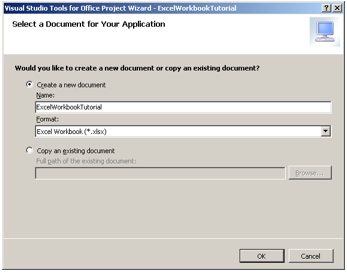
This lets you choose between creating a new workbook or attaching the new assembly to an existing workbook.
 |
 |
Only one assembly can be associated with any one office file
This lets you choose between creating a new workbook or attaching the new assembly to an existing workbook.
Once the application level document has been created you can display the workbook either by double clicking on one of the Sheet.vb files
Creating Excel Workbook
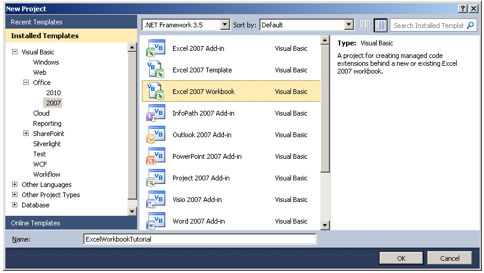
Open Visual Studio and Select (File > New > Project).
Select (Templates / Visual C# / Office / SharePoint / Office Add-ins / Excel 2013 Workbook).
Change the Name to something more descriptive, for example "ExcelWorkbookTutorial"
Change the Location to somewhere on your C drive.
You will only see these templates if the corresponding Microsoft Office versions are installed.
Also make sure that you choose the correct version of the .NET Framework (at the top).
 |
Press OK.
 |
Press OK.
A progress bar will appear while the project is created.
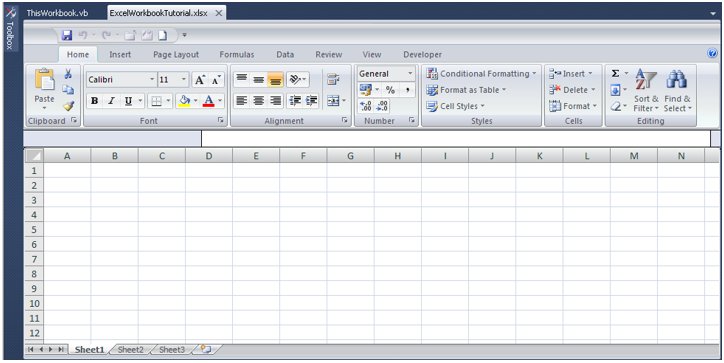
Excel will open inside Visual Studio.
If this does not work then make sure that the "Visual Studio Tools for Office Design-Time Adaptor for Excel" add-in is loaded.
SS
Select (Debug > Start Debugging).
This will launch an instance of Excel with the ExcelWorkbookTutorial.xlsx workbook open.
Close this instance of Excel by pressing the Close button in the top right corner.
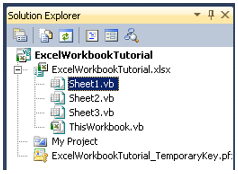
On the right hand side you will see the Solution Explorer task pane. This is the most important task pane in Visual Studio because it shows you the files that are included (and the hierarchy of these files) in the current solution.
 |
You will see the name of the project at the very top (in bold) and the individual files listed below. This is similar to what you would see when writing VBA code in the Visual Basic Editor, Project Explorer.
Select (File > Close Solution).
Select (File > Open > Project / Solution)
Browse to the location where you created the project.
In this example it is C:\Visual Studio 2013\Projects\ExcelWorkbookTutorial\.
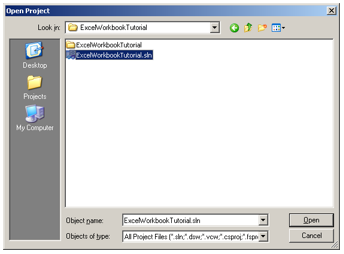 |
Inside this folder you will see a (.sln) file and another sub folder.
This subfolder contains all the files relating to this project.
Although the file extension of this file is ".sln" this remains a project and not a solution.
Highlight the ExcelWorkbookTutorial.sln file and press Open.
This should open your project and you should see the Excel window within Visual Studio. If this does not appear, then double click on the Sheet1.vb icon.
 |
 |
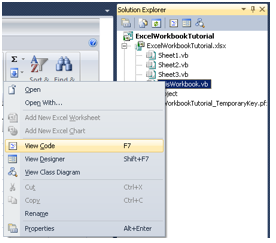
We are now ready to add some code. Right click on the ThisWorkbook.vb file and choose View Code.
 |
This will display the Code Window and will display the following two events:
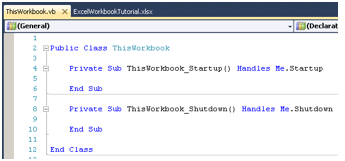 |
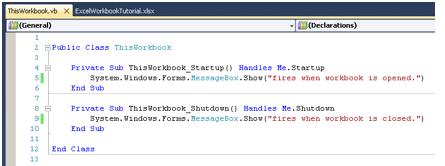
Add the following code:
 |
Save the project by selecting (File > Save All).
Select (Debug > Start Debugging).
When you build a VSTO solution the code is compiled, the necessary assemblies are created and the project is output to the \bin directory.
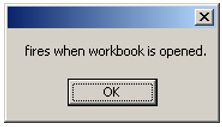
This should launch an instance of Excel with the ExcelWorkbookTutorial.xlsx workbook open and you should see the following message:
 |
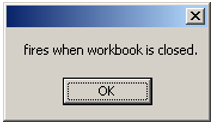
Close this workbook by pressing the Close button in the top right corner.
You should see the following message
 |
Select (File > Open) and browse to the following folder to reopen the file:
C:\Visual Studio\ExcelWorkbookTutorial\ExcelWorkbookTutorial\bin\Debug\ExcelWorkbookTutorial.xlsx
You should see the "fires when open" message
Close this session of Excel by selecting (File > Exit Excel)
You should see the "fires when closed" message
© 2024 Better Solutions Limited. All Rights Reserved. © 2024 Better Solutions Limited TopPrevNext